Planning Your Trip
Best Time to Visit Everest Base Camp
Before jumping to how do you get to Mount Everest Base Camp, it is also quite crucial to understand the best time to ensure a comfortable and pleasant experience. For the most remarkable experience in this mainstream trekking route, the high seasons like autumn (Septemeber to October) and spring (March to May) are recommended. These seasons have favorable climates, trail conditions, and temperatures that guarantee an unforgettable experience during your Himalayan trek. Spring is the ultimate period to explore the wonders of nature in the country. The trails pass through lush forests where the birds are chirping the tunes of spring, and colorful wildflowers, including rhododendrons, take over the landscape.
The temperatures are also pleasant, and the views of pristine Himalayan vistas over the stunning landscape are simply a magical experience. Autumn, on the other hand, is known for the calmness and stability it brings. The climatic conditions are most stable during this period, which ensures clear and crisp views of the Himalayan peaks. The cool temperatures, fall landscape, comfortable trails, and incredible cultural celebrations are some major highlights of this popular trekking season.
Required Permits and Documentation
To get started on the exciting trails of this mainstream adventure, you will need to collect all the necessary permits. During your Everest Base Camp Trek, you will traverse across a national park, a Himalayan conservation area (if you are trekking from the Jiri side), and a restricted area. So, you will have two or three permits to access these restricted and protected sections on the mountain, depending on the route you take.
Permits For Mount Everest Base Camp Trek
- Khumbu Pasang Lhamu Rural Municipality Area Permit- costs US$ 20 per person (for the first four weeks)
- Sagarmatha National Park Entry Permit- costs US$ 30 per person
- Gaurishankar Conservation Area Permit (if you are taking the driving route from Jiri)- costs US$ 20 per person
Trekking Agencies Vs. Independent Trekking
Besides how you get to Mount Everest Base Camp query, if you are curious about the trekking agencies vs independent trekking experience, we would suggest you go for the service of a reliable trekking agency. While trekking through an agency, they will take care of all the logistics details, transport facilities, food and accommodations, paperwork, permits, guide, porter, and even your safety and well-being. So, if you are doing this trek through an agency, you will not need to worry about any aspects of your journey and you can just take your time to relish the Himalayan exploration.
As for independent trekking, although it does provide flexibility to some extent, you will be pretty much on your own throughout the journey. It is not possible for individual trekkers to have a vast network like a trekking agency, so managing different services along the route can be challenging if you are not familiar with the region. You will need to hire a government-licensed guide anyway for your high-altitude journey, so instead of going through the hassle of managing everything, hiring service from an agency will be a much more efficient and remarkable choice.
Getting to Nepal
International Flights to Kathmandu
Before taking on the thrilling Himalayan route that leads to the most popular base camp in the world, you will make your touchdown in this charming country. Green Society Adventure doesn’t handle the international transfer of our clients, so you can freely choose the airlines you prefer to reach Kathmandu. But make sure to update us about your flight schedules so we can send our representatives to receive you at the airport.
Visa Requirements and Immigration Procedures
After you arrive at the Tribhuvan International Airport (TIA), you can apply for the ‘On Arrival Visa’ that is issued at the immigration office counter. There are generally three types of visa that you can apply for depending on your preferred duration in the country.
On Arrival Visa and Fee
- 15 Days Visa- US$ 30
- 30 Days Visa- US$ 50
- 90 Days Visa- US$ 12
If you want to extend your stay in Nepal after the expiry of your tourist visa, you can also apply for a visa extension. You will need to get at least a 15 Days visa extension which will cost US$ 45. The nationals of every country are not eligible for the ‘On Arrival Visa’; the residents of some countries will have to apply for the visa at the embassy in their country prior to arrival. You can check the following list to see the countries that are issued ‘On Arrival Visa’ in Nepal.
Requirement for Visa in Nepal
- A passport and a photocopy with a minimum validity of upto 6 months
- Recent photograph, a passport-size 2x2 color photograph
**Note: To learn more about the requirement, you can check out the following link**
Preparing for the Trek
Physical Fitness and Training
Everest Base Camp Trek is a moderate-level Himalayan trekking adventure. This trekking route doesn’t include any technical segments, nor is the journey physically exhausting like a mountain expedition. Thus, to take on this exciting mainstream journey, even a basic level of fitness will be sufficient. If your fitness is accompanied by good health, there will be hardly any challenge for you during this Himalayan endeavor. By nature, the EBC Trek is a two-week long and high-altitude journey that is physically demanding.
Thats is why, to take on this iconic adventure, you are recommended to train for at least 3 to 6 weeks. You can adjust the training period depending on your fitness level; remember, the more you are fit, the more enjoyable your overall experience will be. Thus, don’t slack out during the preparation part; emphasize your strength, endurance, and stamina aspects to make your Himalayan trip a comfortable experience.
Packing List and Essential Gear
If you haven't previously done high-altitude treks in Nepal, you need to understand that during your trekking journey, you will trek past six climatic zones (from tropical to tundra/trans-Himalayan zone). Thus, you need to pack for the trek accordingly to handle the weather factors of different climatic zones. If you are doing the Everest Base Camp Trek in either of the peak seasons, such as spring and autumn, you will not have to pack any extra gear or layers to cope with the weather challenges.
However, if you are doing this trek in during the low seasons such as winter (December to February) and monsoon (June to August), you will need to be careful about what to pack for your Himalayan trek. During the winter season, snow covers the region below and above the alpine zone, so it is extremely cold. You will need to bring warm, heavy layers, insulated boots, thick gloves, micro spikes, etc., for your trip this season.
As for monsoon, the temperatures are warm in this summer season; the unfavorable climate challenges are the only major concern of this season. Due to continuous downpours, the trekking routes are muddy and slippery, so you will need sturdy footwear for the trek. Similarly, waterproof covers for luggage, raincoats, waterproof outer layers, gaiters, etc, are very crucial for your monsoon exploration.
Journey to Lukla

Flight From Kathmandu to Lukla: What to Expect?
The flight from Kathmandu to Lukla is the most exciting part of the Everest Base Camp Trek. Trekkers refer to this short 35-minute flight as a thrilling and heart-throbbing experience. Lukla Airport is considered one of the most dangerous high-altitude airports in the world due to the difficult landscape of the mountain region. But only the experienced and best pilots operate in this route, so you can rest assured.
During the flight, you will be able to enjoy the diverse natural beauty of this Himalayan nation. Slowly leaving the capital valley surrounded by high hills, you will fly over other deep valleys, lush forests, cascading rivers, and colorful settlements as you head toward the mountain. The aerial views of the pristine giant peaks are one of the major highlights of this exhilarating flight.
Alternative Routes to Lukla (Overland and Helicopter Options)
There are several alternative options that you can take instead of the Kathmandu to Lukla flight. During the high seasons, due to the heavy traffic, flights in this mainstream route are usually re-routed from the Manthali Aiport in Ramechhap. You will be able to reach the Lukla Airport in about 20 minutes if you take a flight from here. If you want to skip the airplane flight, there is also a helicopter flight option on this route, which will cost around US$ 550 per person (on a shared basis).
If you want to include the extensive aerial experience on this iconic trail, you can also check out our 11 Days Everest Base Camp Trek with Helicopter Return. We also offer the 5 Days Luxury Everest View Trek with Helicopter Return if you are looking for a flyover adventure over the base camp, which offers close-up bird-eye views of the iconic eastern Himalayan peaks. Besides these aerial route options for your journey to Mount Everest Base Camp, there is also a roadway option where you will get started on the trekking trail with Kathmandu to Jiri drive. This trekking option starts at the lower Everest region, and you will gradually climb to join the mainstream route, exploring the less-visited settlements and landmarks that reward an off-beaten experience.
**Note: In any route that you want to take for this thrilling Himalayan journey, Green Society Adventure offers a completely customizable option where you can tweak the itinerary plans as per your preference**
The Trekking Route
Overview of the Standard Everest Base Camp Trek Route
The 14 Days Everest Base Camp Trek is the most general itinerary plan for the adventure in this number-one trekking destination in the country. This trekking package is a complete and fulfilling journey that doesn’t include the exploration of all the major highlights in the region, and you will also get enough time to acclimatize properly. The short-duration trek with quick-paced walking isn’t meant for everyone; that’s why this standard duration package is an ideal choice for an enjoyable and comfortable experience.
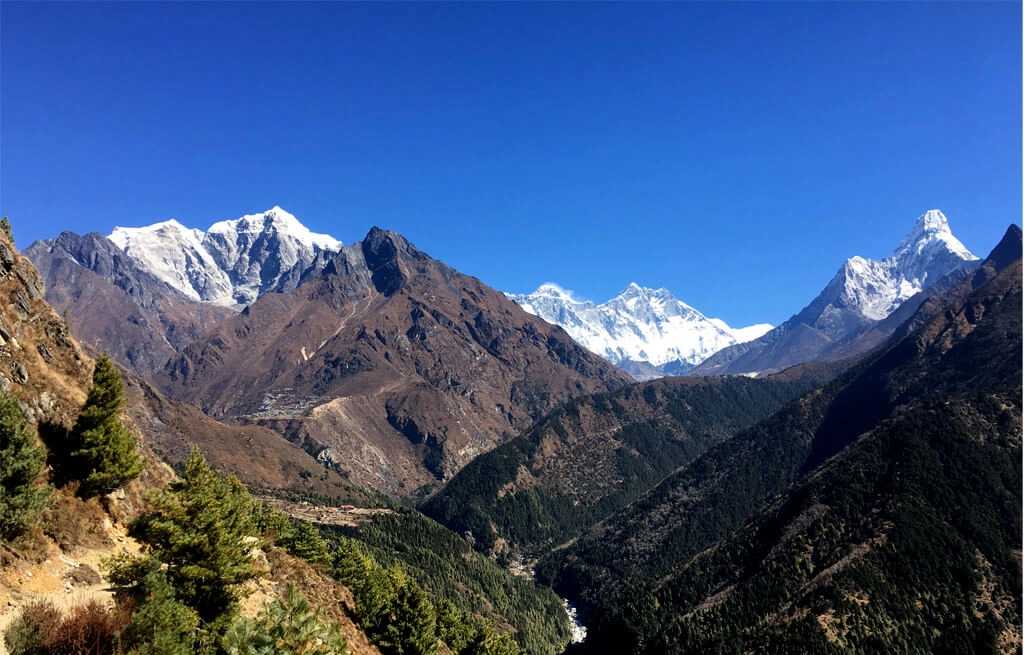
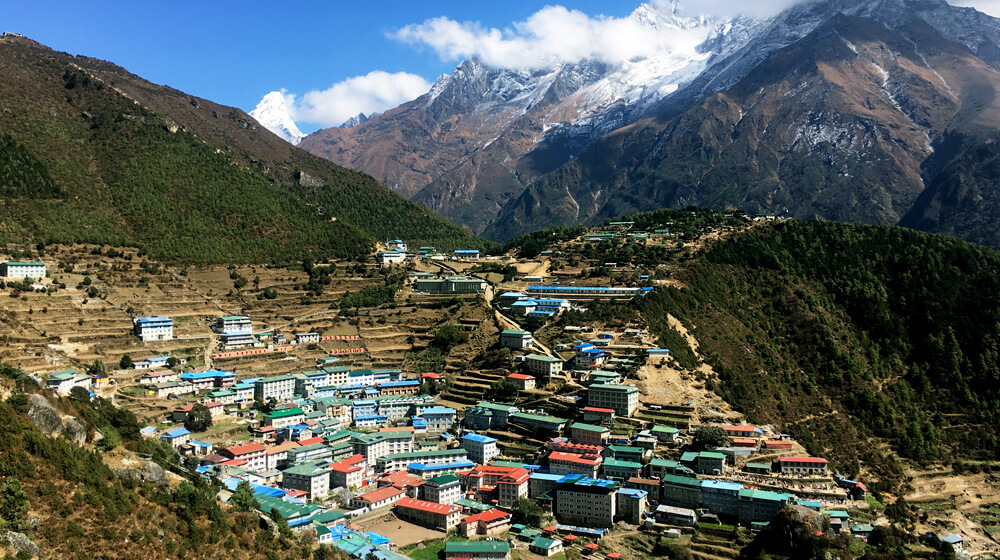
To answer your how do you get to Mount Everest Base Camp query, this is the most general pathway to the foothills of the highest peak in the world. Your journey in this itinerary plan will start after the flight from Kathmandu to Lukla, which is swiftly followed by a short trek to Phakding. You will then gradually take the ascending route across the banks of Dudh Koshi River to reach Namche Bazaar (also your acclimatization destination). Then, you will gradually make your ascend across high-altitude points such as Thyangboche, Dingboche, Thukla, and Lobuche.
The next part of your journey will then take you to Everest Base Camp via Goraskhep. On the following day, you will hike to Kalapatthar to relish the epic sunrise and panoramic mountain views. Then, you will make you gradually descend across Pheriche to Namche to Lukla. The flight back from Lukla above the lush valley and enjoying incredible aerial views of the eastern Himalayas will pull the curtain on your exciting mainstream journey.
Day-by-day Itinerary (Detailed Breakdown of Each Day’s Trek)
If the the overview isn’t clear about how do you get to Mount Everest Base Camp, you can check the following outline itinerary to understand more about the overall Himalayan journey. This is our standard 14 Days Everest Base Camp Trek itinerary plan that you will follow during your trek. Here is the outline overview of this iconic route with elevation and trek duration.
Day 01: Kathmandu (1,320 meters/ 4,329 feet) arrival and hotel transfer
Day 02: Flight from Kathmandu to Lukla (2,800 meters/ 9,184 feet) and trek to Phakding (2,655 meters/ 8,708 feet): 35 mins (flight) and 3 hours (trek)
Day 03: Trekking from Phakding to Namche Bazaar (3,440 meters/ 11,284 feet): 5 to 6 hours
Day 04: Acclimatization at Namche and hike to Everest View Hotel (3,962 meters/ 13,000 feet): 2 to 3 hours
Day 05: Namche Bazaar to Thyangbohce (3,790 meters/ 12,694 feet) trekking: 5 hours
Day 06: Thyangboche to Digboche (4,410 meters/ 14,464 feet): 5 to 6 hours
Day 07: Trek from Dongboche to Thukla (4,620 meters/ 15,154 feet): 3 hours
Day 08: Thukla to Lobuche (4,9301 meters/ 16,172 feet): 3 hours
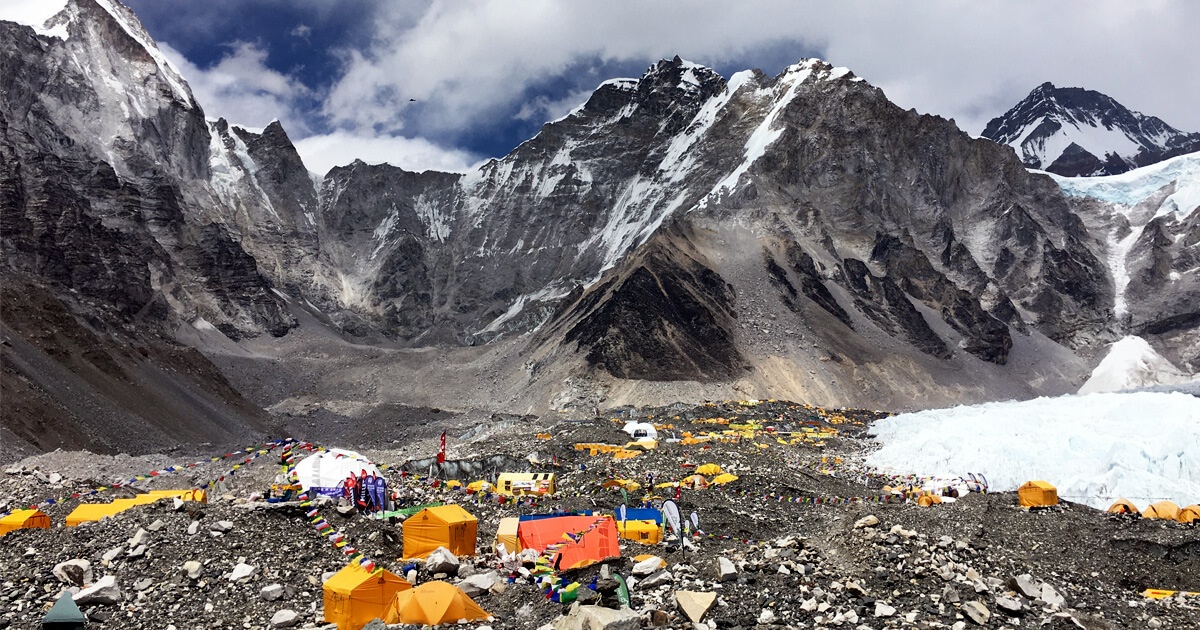
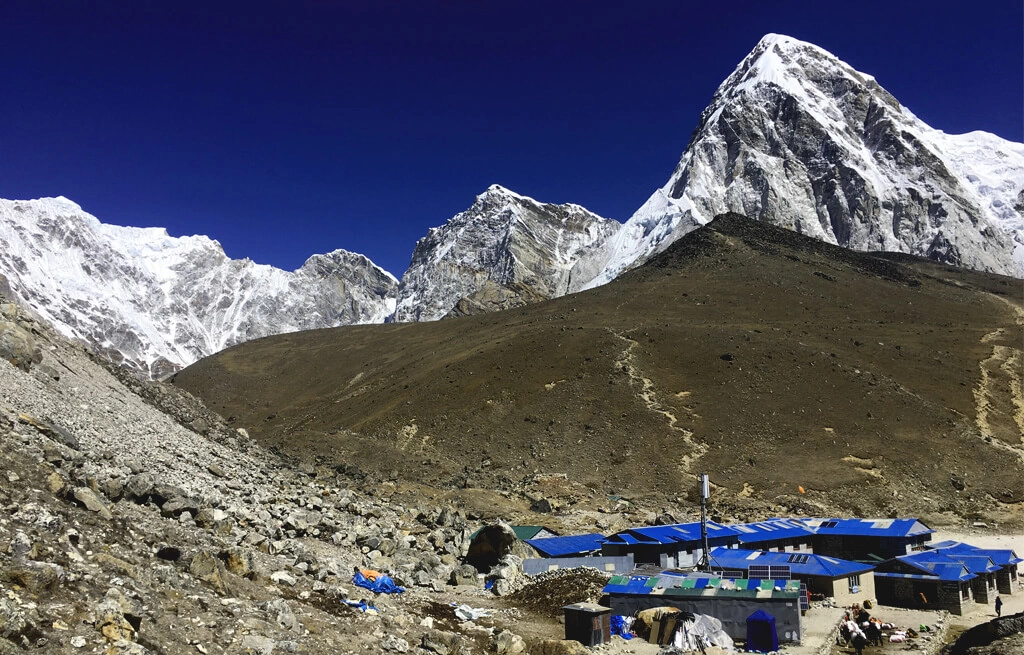
Day 09: Lobuche to Gorakshep (5,160 meters/ 16,929 feet) to Everest Base Camp (5,364 meters/ 17,593 feet) and return to Gorakshep: 7 to 8 hours
Day 10: Morning hike to Kalapatthar (5,560 meters/ 18,236 feet) and trek down to Pheriche (4,200 meters/ 13,776 feet): 7 hours
Day 11: Trekking from Pheriche to Namche Bazaar: 7 hours
Day 12: Namche Bazaar to Lukla: 6 to 7 hours
Day 13: Flight to Kathmandu from Lukla and free day
Day 14: Departure day
Accommodation and Meals
Types of Accommodation
During the Everest Base Camp Trek there are two major accommodation options along the trekking route: teahouses and lodges. Both of these accommodation establishments are run by the natives of the region. As this is a mainstream trekking route in the country, you can expect a good level of facilities during your trek. In a standard trekking package, you will stay at the teahouses, whereas if you are looking for a luxurious mode of accommodation during your trek, lodges are the best viable options.
You will receive all the basic facilities during your stay, such as a bed, mattress, pillow, sheet, bathroom, heater in a communal area, etc. The establishments in the lower regions have levels of services that are on par with any urban motel/lodge. However, as you ascend higher, due to the remoteness, the available services and amenities are slightly limited.
Typical Meals and Dining Options on the Trek
You will be able to enjoy a wide variety of food menus during your trek. The Everest region is a very popular trekking destination in the world that houses some of the most iconic establishments, such as Hotel Everest View (the highest place hotel on earth), the highest pub on earth The Irish Pub, and several other cafes and restaurants. Thus, besides the traditional menus, you will also be able to enjoy a wide range of international delicacies during this trek.
Gain Insights On:
Altitude and Acclimatization
Understanding Altitude Sickness
After understanding how do you get to Mount Everest Base Camp, it is also important to understand the risk of altitude sickness on this high-altitude journey. Regardless of the route you take, you will need to trek to the highest point of the region to explore the major highlights. On the standard trek route, you will begin your journey from Lukla (2,800 meters), the trekking trail, then gradually move along the high altitude points of the region, reaching the maximum point at Kalapatthar (5,560 meters).
So, you will gain an approximate altitude of around 2,760 meters (9,055 feet) during this trek. Although the risk of altitude sickness isn’t major, like in mountain expeditions, you will still need to follow the proper acclimatization process to avoid inconveniences caused by altitude sickness. Green Society Adventure follows all the necessary steps and precautionary methods to keep the risks of altitude sickness at bay. You will trek at a slow pace and will acclimatize at strategic locations during your trek, which is the major preventive measure of altitude sickness. Here are some symptoms of altitude sickness that you should be watchful about during your trek.
General Symptoms of Altitude Sickness
- Headache
- Appetite loss
- Dizziness
- Nausea
- Insomnia
- Shortness of breath
- Fatigue or weakness
- General malaise
Tips for Proper Acclimatization
Here are some tips that you need to follow to prevent altitude sickness during your trek. If you stick to the suggestions that have been provided by the experts, you will be able to avoid inconveniences caused by this high altitude sickness.
- Follow a gradual pace, and don’t climb too fast to higher altitudes
- Eat a balanced diet and stay hydrated throughout your journey
- Get enough rest and take short breathers along the trekking route
- Keep yourself warm and comfortable at higher altitudes
- Do not drink alcohol or smoke cigarettes during the trek
- Participate in acclimatization hikes during the rest days
- Pay attention to the symptoms of altitude sickness
- Keep a positive attitude and surround yourself with positive people
Challenges and How to Overcome Them
Physical Challenges and Trekking Difficulties
The Himalayan region is one of the most remote and isolated parts of Nepal. Thus, during the trekking part, you will have to walk on an uneven and rugged path. Similarly, you will traverse across the forest trail, mountain tail, loose soil, rock and boulder sections, and even moraine and glacial debris.
As this is a high-altitude mountain exploration, you will also need to have good leg strength to overcome the consistently steep section along the trail. Thus, you will need a good level of physical strength, endurance level, stamina, and core stamina to keep balance and overcome the physical demands of the trail.
Weather and Climate Considerations
The trekking adventures in Nepal are year-round adventures that showcase different sides of the mountain depending on the season of your visit. If you are looking for a guaranteed comfortable and pleasant experience where you don’t need to deal with the challenging weather phenomenon, you should do this trek in either autumn or spring. In case you are looking for a distinctive experience straying farther from these peak points, you should make the preparation for your trip accordingly.
You will need warm layers and gear to deal with the snow-covered landscapes of the winter. As for the monsoon, the temperatures are warm but the weather can be unpredictable. So, you should consider arranging a few extra contingency days for your Himalayan exploration in this season.
Dealing With Trekking Fatigue and Injuries
If you are doing a fully guided expedition, such as Green Society’s Adventure’s 14 Days Everest Base Camp Trek, your trekking agency will take care of every aspect of your journey. Your comfort, well-being, safety, security, and even the enjoyability scale will all be overseen by the agency managing your trek. If you are doing this trek on your own, you will need to be prepared for any unforeseen circumstances, such as sickness, injuries, and even altitude sickness during your trek. To overcome such circumstances, you will need a proper understanding of the location of the health post along the trail, safe first-aid conducts, and proper networking for evacuation if necessary.
Generally, in the guided treks, the trekking team is led by a well-experienced guide and team who are trained in high altitude treatment and first-aid response. So, they take proper precautions and methods the risks during the trek, and in case of any unforeseen circumstances, they make the call after proper evaluation. The injured or sick trekkers are either taken to health facilities at lower altitudes for proper rest or, if the case is serious, a helicopter rescue operation is initiated with proper coordination with the guide, flight operator, and trekking agency.